First, you must choose whether to operate in Overwrite or Create mode. Usually, if you are interested in just applying a filter to existing video or to insert a transition between scenes you use Overwrite .
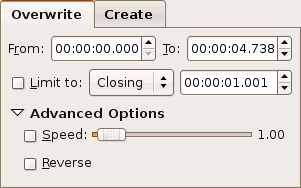
Overwrite affects a range of frames in your existing movie and then non-destructively replaces those frames. By non-destructive, we mean that Kino merely automates the process of editing the newly rendered file into place rather than actually modifying any existing DV file. You can set an overall time range, and then limit the range to the beginning or end for a specific duration. Often, the Limit to option is easier than specifying the exact range. Some notes follow:
Upon entering FX, Kino sets the range to the current scene.
Click a scene in the Storyboard to set a range to the selected scene. If you want to extend the range to the entire movie, then enter a large number like 99999 into the To time field.
Narrow down the selection using the Limit to checkbox and option menu. Choose Closing to limit backwards from the ending ( To ) time. Otherwise, choose Opening to limit from the beginning of the range. Then, set the duration of the limit.
Click Advanced Options to change the Speed (repeat or drop frames) or Reverse the flow of the video.
![[Tip]](images/tip.png) |
Tip |
|---|---|
|
The typical sequence to setup a transition between a scene A and scene B is:
|
Create generates and inserts new frames into your project from a variety of sources.
The built-in sources include various colour manipulators and importing still image frames ( From File ).
Installed plug-ins will be appended to the list of those available.
The default insertion point is before the current frame (the last frame show in Edit mode). Click a scene in the Storyboard to change the insertion point.
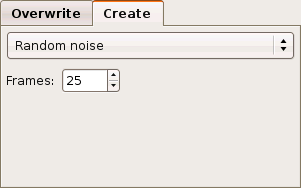
Click Create to use a video creator, or generator. There are several from which to choose. You can apply audio and video filters and transitions in conjunction with a generator. The sections below describe each video generator that is available. The Frames field determines how many video frames will be created.
The resolution and video standard of the generated video is automatically based upon the first frame in your movie. If the movie does not yet have any clips, then it uses the values specified in ->->.
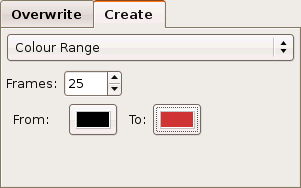
The Colour Range video generator fills the first frame with the From colour. Over the duration of the effect—as specified using the Frames field—the frame remains a solid colour, but the colour transitions to the To colour. It performs this colour transition by interpolating the RGB values.
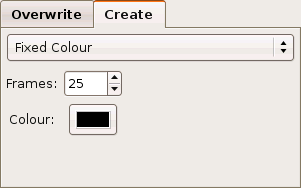
The Fixed Colour video creator is simple—it completely fills the frame with a single colour over the entire duration of the effect.
|
Tip |
|---|---|
This generator makes for a nice background generator to the Titler and Superimpose video filters. |
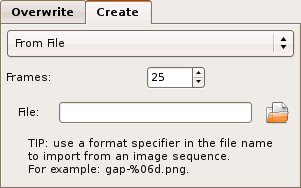
The From File video creator imports an image file or image file sequence (e.g., animation). The creator supports many image file format because it uses GDK's pixbuf library, which has plugin system. Most systems have built-in support for the popular formats of PNG, JPEG, GIF, and BMP. You can find out what your system supports by running gdk-pixbuf-query-loaders in a terminal window. See the gdk-pixbuf documentation for more information.
To import a file sequence, you must enter a format string containing pattern-matching macros. See the printf or scanf man pages for more information. A pattern of "%6d" would match a number containing up to 6 digits. A pattern of "%d" would match a number with any number of digits, and a pattern of "%06d" would match a number contain exactly 6 digits, padding with zero where needed.
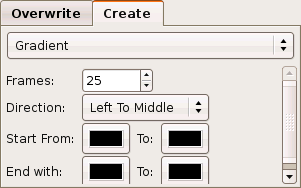
The Gradient creator is a linear gradient generator that can change colour over time. The gradient is a smooth transition from the From colour to the To colour within a single frame. In other words, the frame is not a solid colour. Direction determines the line along which the gradient lies. In addition, using Start and End the gradient can change over time.
|
Tip |
|---|---|
The Gradient effect makes a nice background generator for the Titler and Superimpose video filters. |